Friday, September 29, 2023

Apple-solutely Awesome


 Apple-solutely Awesome…

   Hello Friends and welcome!  Sharing this adorable project with you today featuring the Lawn Fawn “Apple-solutely Awesome” set…aren’t this mice just the cutest!!?!  This set includes everything you need to create a fun fall themed project.

   To start, I trimmed a piece of Neenah solar white cardstock and ink blended the background using Distress Ink Oxide in broken china. Then chose a piece of Lawn Fawn’s “Gotta Have Gingham rainbow” patterned paper and die cut using Lawn Fawn’s “simple stitched hillsides”.  Afterwards I die cut both panels using Lawn Fawn’s stitched rectangles. Next, I stamped images, die cut using coordinating dies, and Copic colored.  I assembled elements and adhered to card base using liquid glue then began working on the sentiment.  For that, I stamped several sentiments together then white heat embossed before die cutting using Lawn Fawn’s “everyday sentiment banners”. 

   Thanks so much for stopping by, wishing everyone an “Apple-solutely Awesome” day!!, take care!


Saturday, September 2, 2023

Happy Hauntings


 SimonSaysStamp Happy Hauntings…

Hello Friends and Welcome!! I’m super excited to share this project with you featuring the new Happy Hauntings set from the SimonSaysStamp STAMPtember release!! If you are new to SimonSaysStamp STAMPtember it is a month long party celebration featuring fun gifts, giveaways, and collaborations sets from your favorite paper crafting companies!  

Today’s card features the new Happy Hauntings set…these are the cutest dragons!! To start, I stamped the image onto a piece of Copic friendly cardstock then Copic colored the image.  I then masked the image and ink blended the background using Distress Ink in Black Soot.  Next, I die cut the panel and the patterned paper using both stitched and regular rectangle die cuts. I then stamped the sentiment using Versamark ink then white embossed using Hero Arts embossing ink.

For more inspiration please visit the SimonSaysStamp blog! Happy STAMPtember friends!!

Thanks so much for stopping by…take care!

Below is a special gift for you!


Saturday, August 12, 2023

Spellbinders House Mouse


Spellbinders House Mouse…

   Hello Friends and Welcome!  I have a special 2 project post to share with you today featuring 2 new sets from Spellbinders.  These adorable mice from the “House Mouse” collection are a perfect way to send a Happy Holiday message to any recipient!

This first card (pictured above) showcases the adorable “Mistletoe Kisses” stamp set.  I began by stamping image onto a trimmed piece of Copic friendly white cardstock panel.  I chose to stamp the image using Memento Rich Cocoa ink which is Copic friendly ink.  I thought the warm brown ink would help show the lovely details of the stamp plus help with coloring of the image.  I planned on coloring the mice using brown shades of Copics so using the brown ink would help with not having to over saturate the paper with the alcohol ink from the Copic markers.  After the image was colored, I added a little bit of sparkle to the Mistletoe berries and the red in the candy canes using Wink of Stella in clear.  Next, I trimmed a piece of gold mirror cardstock as well as a red piece of cardstock to layer underneath the colored image.  I then adhered the layers together onto a folded A2 sized red cardstock card base.  To finish with the sentiment, I stamped the sentiment onto a scrap piece of matching red cardstock, gold heat embossed, then fussy cut the sentiment out and adhering to panel using thin foam squares.


The second card features the super cute set “Noel” from the House Mouse collection.  This card is a one layered A2 sized card with the exception that I adhered the panel using a piece of thin fun foam to the kraft cardstock card base.  To begin, I stamped the image onto a trimmed piece of Bristol smooth cardstock the watercolor end the image using Zig Clean Color markers.  Again, I chose a brown ink to show the beautiful details of the image but used Versafine Vintage Sepia to heat embossed.  Once image was stamped and heat embossed using a clear embossing powder, I applied the color directly to the image then used a damp brush to pull the color out from the edges towards the middle of the images.  Once image was colored, I stamped the image again onto masking paper then fussy cut image out.  With the mask covering the image, I ink blended the border of the panel using Distress Ink in blueprint sketch and tumbled glass.  To add a little bit of more interest and with the mask still in place, I ink splattered the panel using white gouache and a liquid iridescent medium.  To finish, I pulled the mask off, then added a dab of glossy accents to the red berries.

Thanks so much to Spellbinders for creating such adorable mice!  These images are so wonderfully detailed and are so fun to work with whatever color medium you choose.  I hope these cards inspires you to create some cute and colorful Holiday cards!  If interested in these new sets or other fun new products from Spellbinders, click this link. https://spellbinderspaperarts.com/

Supplies featured:

Spellbinders: House Mouse sets: Mistletoe Kisses and Noel

Cardstock: white, red, gold mirror, kraft, and Smooth Bristol

Copic Sketch markers 

Zig Clean Color markers 

Inks:  Memento Rich Cocoa, Versafine Vintage Sepia, Distress Inks: blueprint sketch and tumbled glass, Versamark 

Gold embossing powder

Thanks so much for stopping by…take care!


Wednesday, August 9, 2023

Spellbinders Snowman Hugs


 Spellbinders Snowman Hugs…

   Hello Friends and welcome!  I have an adorable project to share with you today featuring the new Spellbinders “Snowman Hugs and Snowman Hugs Faces and Sentiments”.  This adorable new set has several cute snowman that can be used to create a beautiful winter scene and/or a fun and festive Holiday card.  For today’s card, I chose to create a peaceful winter scene.  

To start, I trimmed a piece of white card stock then chose several Distress Inks to ink blend a background.  I wanted to create a warm winter scene to showcase this adorable snowman.  I chose to ink blend Chipped Sapphire, Victorian Velvet, and Tattered Rose Distress Inks.  I ink blended the panel using blending brushes beginning at the top then bringing the color down the panel. I went over the colors several times to try and achieve a smooth blend of color.  Once the panel was blended, I wanted to add a bit more interest and wanted to create a “snowy scene” so I grabbed my white gouache and a liquid iridescent to ink splatter the background.  Next, I began to build my snow image.  I first, die cut the snowman using a white cardstock then die cut the scarf using a peachy cardstock color.  I thought the scarf looked a little two dimensional on the snowman so I added a little shadow to the scarf using a light orange Copic and a white gel pen to the scarf’s fringe.  I then created a snow drift or border for the snowman.  For this, I just trimmed a piece of white cardstock then traced the trimmed piece border onto a piece of silver glitter cardstock and cut.  Before adhering elements to the background panel, I stamped and heat embossed sentiment using Ranger liquid platinum embossing powder.  I adhered snow bank border and snowman to the ink blended background panel using a liquid glue.  I next, adhered panel using a trimmed piece of fun foam to a folded blue cardstock A2 card base.  I finished by adding a few clear sequins.

Thanks so much to Spellbinders for creating such a fun Snowman!  This set includes several fun Snowmen and adorable accessories to create a fun Wintery and/or Holiday scenes.  This snowman looks so happy and wants to send everyone a warm hug!  If interested in this new set or any other new products from Spellbinders just click this link. https://spellbinderspaperarts.com/

Thanks so much for stopping by…take care! 

Spellbinders Gnome Drive Holiday


 Spellbinders Gnome Drive…

   Hello Friends and welcome!  I have a fun project to share with you today featuring the new “Gnome Drive Holiday” from Spellbinders.  The new Gnome Drive collection includes several fun Holiday sets and Special occasion sets that create a fun scene featuring this adorable Gnome!  For today’s project, I chose the Holiday Gnome Drive to create a fun and festive Christmas card.

  To start, I grabbed a piece of white cardstock then ink blended the panel using Blueprint Sketch Distress Ink.  To add a little bit of more interest to the background panel, I ink splattered using a white gouache and  a liquid iridescent.  Next, I grabbed several colors of cardstock to die cut the pieces of the Gnome Drive Holiday set.  I chose a festive color palette knowing that some of the pieces of the color were going to be yellow such as the headlights and the tree would be a traditional green Christmas tree.  By only using a few colors of cardstock, I tried to keep the scene more cohesive.  Once all the pieces of the Gnome Drive Holiday set were die cut, I assembled the pieces and adhered them together using a liquid glue.  Before adhering the car to the panel, I stamped the sentiment from the “Gnome Drive Sentiments” using a black pigment ink. I then adhered the car using thin foam squares and finally adhered panel using a liquid glue to a folded red A2 card base.  

A huge thanks to Spellbinders for creating such a fun die cut set, these Gnomes are so much fun to create with!  I hope this card inspires you to create fun and festive Holiday cards!  If interested in this new product line or other fun new products from Spellbinders, click this link below. https://spellbinderspaperarts.com/

Supplies featured:

Spellbinders: Gnome Holiday Drive and Gnome Drive Sentiments

Distress Ink: Blueprint Sketch 

Colored cardstock 

Versafine Onyx black pigment ink

Liquid glue 

Thanks so much for stopping by…take care!

Tuesday, July 25, 2023

Pinkfresh Studio Watercolored Floral Border


Hello Friends and welcome!  I have a pretty project to share with you today featuring the Pinkfresh Studio Floral Border set.  I just loved how this project turned out!  I grabbed my Altenew Artists Watercolor set and watercolored these pretty blooms using a light wash of color them going back over intensifying the colors by adding another layer of color.  Once the floral border was dry, I die cut image using the coordinating die.  To add a little more interest to the background, I die cut a piece of MFT’s boysenberry cardstock then ink splattering a gold watercolor over the piece then die cut that piece also using the Floral Border die.  I next, stamped the sentiment then gold heat embossed.  To finish, I assembled elements and adhered to a matching card base then added a few gold metallic pearls.  Thanks so a much for stopping by…take care!

Supplies featured:

Pinkfresh Studio: Floral Border stamp/die cut; Metallic Gold Pearls

Altenew: Artists Watercolors

Brutus Monroe: Gilded embossing powder

MFT’s: Boysenberry cardstock

Monday, July 3, 2023

Just Plane Awesome


 Just Plane Awesome…

   Hello Friends and welcome!  I have a fun project to share with you today featuring these adorable mice from Lawn Fawn from their May 2023 mini release.  To begin, I trimmed a piece of Neenah solar white cardstock then ink blended Salvaged Patina Distress Oxide ink over a cloud stencil.  I began ink blending from the top of the panel and working my way down towards the bottom rotating the stencil as I went down.  Next, I ink blended a scrap piece of Neenah solar white cardstock using Twisted Citron and Lucky Clover Distress Oxide inks before die cutting using Lawn Fawn grassy border.  To add a little more interest to the background, I flicked white gouache paint and Salvaged Patina Oxide ink onto the cloud panel and white gouache paint, Twisted Citron, and Lucky Clover Oxide Inks to the grassy border panel. I then began stamping these adorable mice before die cutting using the coordinating dies.  Next, I Copic colored images.  I then assembled elements onto the background then decided the placement of the sentiment.  I stamped sentiment onto cloud panel using Altenew Obsidian black pigment ink then adhered images using a liquid glue before adhering the whole panel onto a Neenah desert storm card base.  I hope you enjoy these cute mice as much as I do, they are “ Just Plane Awesome”!! Thanks so much for stopping by…take care!

Supplies featured:

Lawn Fawn Just Plane Awesome stamp/die set; grassy border 

My Favorite Things cloud stencil

Copic Sketch Markers 

Distress Oxide Inks: salvaged patina, twisted citron, lucky clover

White Gouche 

Neenah solar white cardstock 110 lb and Desert Storm 100 lb

Liquid Glue 


Saturday, June 3, 2023

Friendliest Flowers


 Friendliest Flowers…

   Hello Friends and welcome!  Today’s project features the Daisy Bouquet set from Honeybee Stamps.

   Other products featured:

Pinkfresh Studio dye inks

          The Stamp Market delicate dots hot foil plate

           Spellbinders Glimmer foil in Aura 

           Altenew matte gold sequins

   To start, I stamped floral image onto a piece of Neenah solar white cardstock in a light brown dye ink then placed the coordinating stencil over image and began ink blending.  Once the ink blending was complete, I die cut image using the coordinating die.  I then hot foiled the background piece before die cutting using a stitched rectangle.  For the sentiment, I chose the Honeybee Stamps My Favorite Flower and stamped onto a piece of SimonSaysStamp cream cardstock.  To finish, I assembled elements and adhered cream card base using a liquid glue and fun foam for floral image and sentiment before adding a few sequins.

   I hope you enjoyed todays card featuring this beautiful daisy bouquet.  “Don’t you think daisies are the friendliest flower?”- Meg Ryan in You’ve Got Mail….  Thanks so much for stopping by and take care!

Rainy Days and Puddles


Rainy Days and Puddles…

   Hello Friends and welcome!  Today’s card features several newer products from Mama Elephant including the Rainy Days set and Raindrops Cover.  

   Other products featured:

              Lawn Fawn  Puffy Clouds and Storm Cloud cardstock

              Copic Sketch markers

    To start, I die cut the cloud and backdrop cover.  I then stamped, die cut, and Copic colored images.  Next, I assembled elements then stamped and white heat embossed sentiment onto a piece of black cardstock.  To finish, I adhere the images using liquid glue for most of the elements and then adding a bit of dimension to the umbrellas and bottom portion of the sentiment using thin foam squares.  

   I hope this card inspires you to “play in the puddles” on Rainy Days or just craft the day away!  Thanks so much for stopping by…take care!


Monday, May 15, 2023

Potted Roses Box Card


 Potted Roses Box Card…

   Hello Friends and welcome!  Today's card features a few recently released products from Pretty Pink Posh including the Scallop Box Card die set and Potted Roses set.

  To start, I die cut the Scallop Box card elements from colored cardstock and Neenah solar white cardstock.  I then ink blended the “scallop” pieces using Distress Ink and a grid stencil.  Next, I stamped, die cut, and Copic colored the rose images.  I then assembled elements then stamped sentiment.  To finish, I assembled the box card and adhered images using a liquid glue.

Supplies: 

Pretty Pink Posh: Potted Roses, Scallop Box Card, and Flower Garden stamp set

MFT’s: Summer Splash cardstock 

Simon Says Stamp: grid stencil

Copic Sketch markers 

White Gel Pen

Barely Arts Liquid Glue

Memento Ink: Rich Coco

   Thanks so much for stopping by…take care!

Sunday, April 16, 2023

Happy Day Bunnies


Happy Day Bunnies…

   Hello Friends and welcome!  Today’s card features these adorable bunnies from Mama Elephant…aren’t they just the cutest!?!  I created a fun spring scene for these adorable critters.  To start, I ink blended over a grassy stencil using Distress Inks and a few blending brushes.  I then ink blended the top portion also using Distress Inks.  Next, I stamped and die cut images using coordinating die cuts then Copic colored images.  After all the coloring was complete, I assembled elements, stamped sentient, then adhered images using a liquid glue.  Thanks so much for stopping by…take care!

Supplies used:
Mama Elephant: Little Bunny Agenda and Christmas Scene sets
Lawn Fawn: Grassy Stencil and Butterfly Kisses stamp/die set
MFT’s: wonky stitched rectangles 
Distress Inks: twisted citron, mowed lawn, salty ocean, and tumbled glass
Copic Sketch markers
Cardstock: Neenah solar white 110lb and desert storm 100lb 
Bearly Arts liquid glue


Wednesday, April 5, 2023

Colorful Easter


 Colorful Easter…

   Hello friends and welcome!  Sharing this fun and colorful Easter project today using Lawn Fawn’s Easter Before ‘n Afters and Magic Picture Changer.

To start, I stamped the images I wanted to use inside the picture window using a Copic friendly ink.  Once images were stamped, I masked off the images then ink blended the background using Distress Inks in dusty concord and shaded lilac, then Copic colored images.  Next, I die cut the components to the Magic Picture Changer and assembled.

To add some more interest to the window area, I die cut the grass using Lawn Fawn’s grassy borders then ink blended using Distress Ink mowed lawn, and stamped/ die cut several more images from the Easter Before ‘n Afters.

 I then assembled all the elements and adhered to the card base using liquid glue and added a foam piece to help the changer component move easily up and down.

Thanks so much for stopping by…Wishing you a Happy and Colorful Easter! 


Tuesday, April 4, 2023

Concord and 9th Kites


 Concord and 9th Kites…

   Hello Friends and welcome!  Sharing this project with you today featuring several fun products from Concord and 9th.

Products featured: Kite Strings, Kite Builder, and Kite Turnabout 

   To start, I stamped the Kite turnabout stamp using several Concord and 9th inks including stardust, grapefruit, honeysuckle, and eggplant.  

   I then began building my kite using coordinating cardstock also from Concord and 9th.  Once I had the kite put together, I added some fun foam to turn it into a shaker kite!  So fun!!  

   To finish, I added some fun shaker bits, adhered to shaker kite to my stamped background and added the sentiment.

   Thanks so a much for stopping by…take care!

Tuesday, February 21, 2023

Sweet Strawberry


Sweet Strawberry…

   Hello Friends and welcome!  Today’s card features several Lawn Fawn products including the Plaid Stencil set, Strawberry Patch die cuts, Outside In Strawberry, and Strawberry Stitched Frame.  To start, I placed the plaid stencil over a trimmed piece of Neenah solar white cardstock then ink blended using Distress Inks in twisted citron, mowed lawn, rustic wilderness, and pine needles.  I then die cut the strawberry from another piece of Neenah solar white cardstock and ink blended using Distress Oxide Inks in candied apple, abandoned coral, and saltwater taffy.  Next, I die cut the leaf/stem from green cardstock and the floral from white cardstock.  To add a little sparkle, I die cut the strawberry seeds from Lawn Fawn’s Spring Sparkle cardstock then inlaid the seeds and added to the centers of the flowers.  For the sentiment, I stamped Lawn Fawn’s Wavy Sayings onto the Wavy Banners and white heat embossed.  To finish, I assembled elements, glued elements to plaid background, and added a little dimensional squares to the larger flower and banner sentiment.  Thanks so much for stopping by…take care!

Saturday, January 21, 2023

Happy Heart Day


Happy Heart Day…

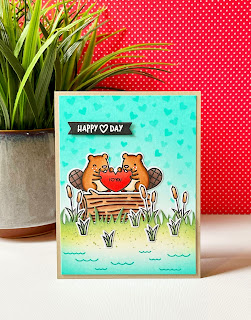
   Hello Friends and welcome!  Joining in the current Lawn Fawnatics Challenge “Lots of Hearts” using the fun new set from Lawn Fawn “Wood You Be Mine” and new stencil “Lots of Hearts”.  To start, I ink blended a piece of Neenah solar white cardstock using peacock feathers Distress Oxide ink.  I ink blended starting at the top then fading down towards the bottom.  I then placed the “Lots of Hearts” stencil over panel and ink blended using the same ink color.  Next, I die cut a piece of Neenah solar white cardstock using Lawn Fawn’s “Grassy Border” die then ink blended that piece using rustic wilderness and peeled paint Distrsss Oxide inks.  To add a little bit more interest, I splattered ink over the top portion of the grassy die panel, then ink blended the bottom portion using peacock feathers Distress Oxide ink and stamped the water ripple images again using peacock feathers oxide ink.  After the ink blended was complete, I stamped and die cut images from the “Wood You Be Mine” set then die cut using the coordinating dies.  Next, I Copic colored images and arranged elements to the background panel.  To finish, I adhered images to panel, stamped sentiment and white heat embossed, before die cutting using Lawn Fawn’s “Everyday Sentiment Banners”.  Thanks so much for stopping by…take care!  Please note: this card has been submitted to the current #lawnfawnaticschallenge#141 

Saturday, January 14, 2023

Chasing the Gray Away


Chasing the Gray Away…

   Hello Friends and welcome!  A cold cloudy gray January Day had me day dreaming of blue skies and sunshine, so I reached for the Pinkfresh Studio Blooming stamp/die cut/stencil combo and a handful of warm toned Pinkfresh Studio dye inks.  For this card, I chose to use the stencil, but love the idea that this set can be used in a variety of ways.  

   To start, I placed the stencil over a trimmed piece of Neenah Solar White cardstock and then ink blended.  I chose to have the pinks be the center of the floral branch, so I started with the yellow, then orange, then finally with the pink.  I used only 1 ink color for each, but intensified the color with each stencil (5 stencil set).  Once the ink blended was finished, I die cut the panel using MFT’s double stitched rectangle stacks, then stamped a coordinating sentiment from the set using Altenew Obsidian black pigment ink.  To finish, I adhered a few pink jewels from PrettyPinkPosh.  

   Thanks so much for stopping by…take care!